实现路由导航跳转的几种方式
时间:2022-06-171、this.$router.push跳转路由/添加路由
总结
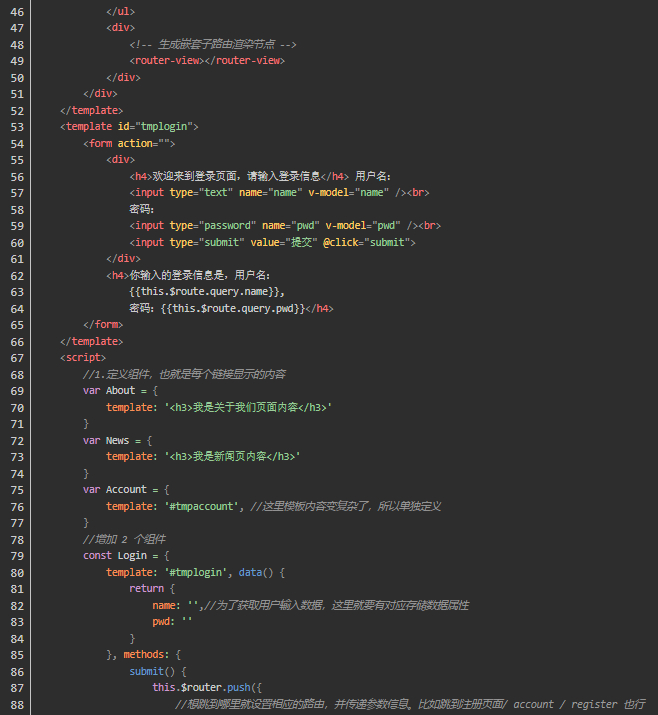
对于网站建设公司来讲这个方法就是通过按钮跳转页面并传递参数过去,通俗来讲就是通过this.$router.push方法来提交表单给导航栏替换路由实现导航跳转和传参。
在 push 方法中,参数可以是一个字符串路径,或者是一个描述地址的对象
// 字符串 => /account/register
this.$router.push(‘/account/register’)
// 对象 => /account/register
this.$router.push({path:‘/account/register’})
// 带查询参数 1
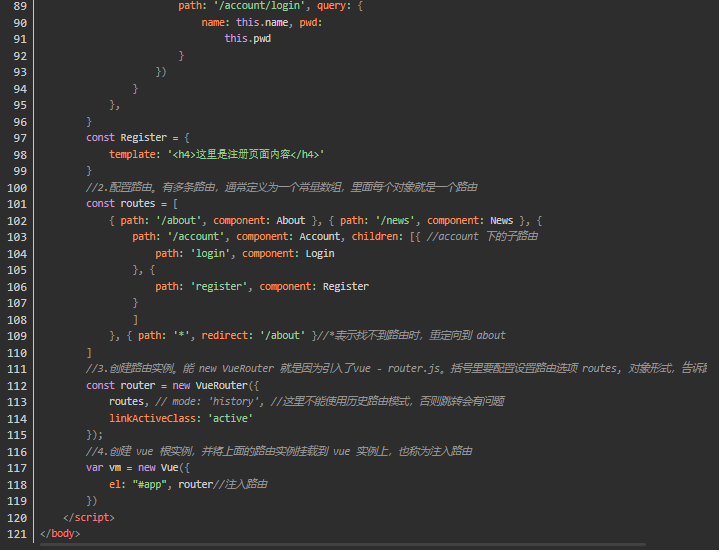
this.$router.push({path:‘/account/login’,query:{name:this.
name,pwd:this.pwd}})
// 带查询参数 2
this.$router.push({path:‘/account/login?name=’ + this.name+ ‘&pwd=’ + this.pwd})
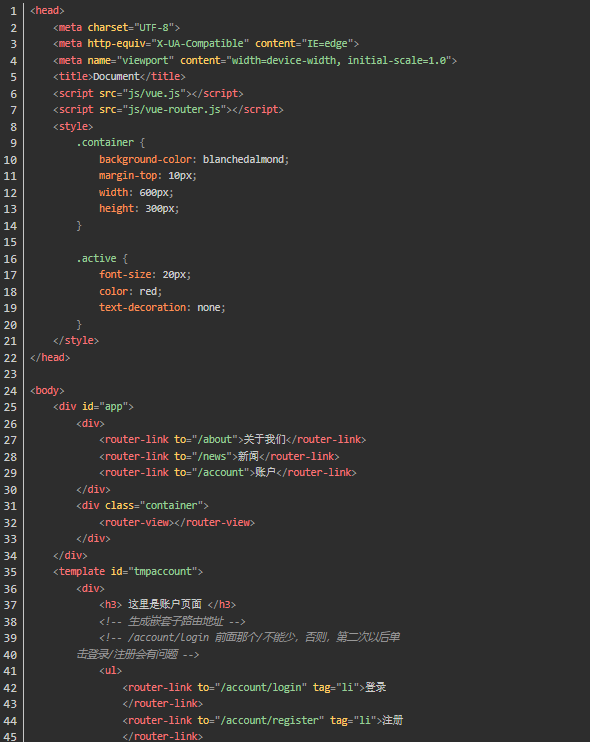
上面传递参数我们都是“写死”的,现在我来改为由用户输入。
在 Vue Router 中具有三种导航方法,分别为 push、replace和 go。我们前面例子中通过在页面上设置 router-link 标签进行路由地址间的跳转,就等同于执行 push 方法。
1.$router.push()跳转路由/添加路由
当我们需要跳转新页面时,我们就可以通过 push 方法将一条新的路由记录添加到浏览器的 history 栈中,通过 history 的自身特性,从而驱使浏览器进行页面的跳转。同时,因为在 history 会话历史中会一直保留着这个路由信息,所以当我们后退时还是可以退回到当前的页面。
在 push 方法中,参数可以是一个字符串路径,或者是一个描述地址的对象
// 字符串 => /account/register
this.$router.push(‘/account/register’)
// 对象 => /account/register
this.$router.push({path:‘/account/register’})
// 带查询参数 1
this.$router.push({path:‘/account/login’,query:{name:this.
name,pwd:this.pwd}})
// 带查询参数 2
this.$router.push({path:‘/account/login?name=’ + this.name+ ‘&pwd=’ + this.pwd})
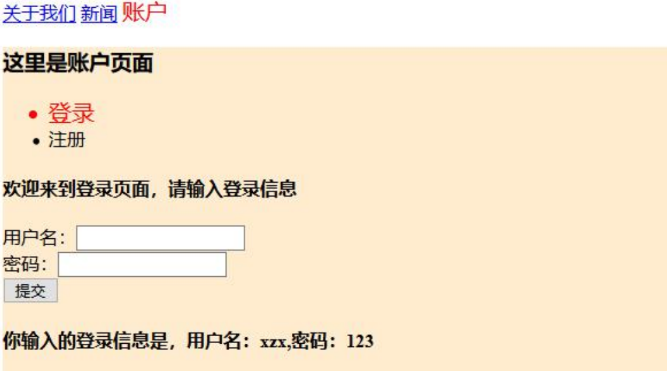
需求:在上例中,单击【账户】进入账户页面,该页面有【登录】和【注册】两个导航链接,单击【登录】链接进入登录页面,该页面中提供用户名和密码输入框及【提交】按钮,单击【提交】按钮在当前页面显示出用户名和密码信息


运行效果:

如果要改为在【注册】页面显示信息,只要把 push 方法跳转对象更改下即可,如下:
this.$router.push({
//想跳到哪里就设置相应的路由,并传递参数信息。比
如跳到注册页面/account/register 也行
path:‘/account/register’,query:{name:this.name,p
wd:this.pwd}
})
2、$router.replace ()替换路由
replace 方法同样可以达到实现路由跳转的目的,不过,从名字中你也可以看出,与使用 push 方法跳转不同是,当我们使用replace 方法时,并不会往 history 栈中新增一条新的记录,而是会替换掉当前的记录,因此,无法通过后退按钮再回到被替换前的页面。
需求:在【账户】页面下有一个【替换路由】按钮,单击该按钮,跳转到【新闻】页面。
在上面例子中修改 2 处。
1、在【账户】页面下增加【替换路由】按钮,即下面黄色底纹代码。
<button @click=“replace”>替换路由</button>
2、添加相应的方法
methods:{
replace(){
this.$router.replace({
path:‘/news’ })
}}
结果:


3、$router.go()跳转
当我们使用 go 方法时,我们就可以在 history 记录中向前或
者后退多少步,也就是说通过 go 方法你可以在已经存储的 history路由历史中来回跳。
// 在浏览器记录中前进一步,等同于 history.forward()
this.$router.go(1)//下一页
// 后退一步记录,等同于 history.back()
this.$router.go(-1)//上一页
// 前进 2 步记录
this.$router.go(2)
// 如果 history 记录不够用,会导致失败
this.$router.go(-60)
this.$router.go(60)
4、$ router 与$ route 的区别
(1)$router : 是路由操作对象,实例对象,只写对象,比如:
添加路由$router.push({ path: ‘/account/login’ });
替换路由$router.replace({ path: ‘/news’ })
(2)$route : 路由信息对象,只读对象。比如:
获取路由的路径$route.path;
获取 param 方式传递的参数$route.params.name
获取 query 方式传递的参数$route.query.name
-
思洋 · 广州总部
广州天河区珠江新城富力盈力大厦北塔2706
020-38013166(网站咨询专线)
400-001-5281 (售后服务热线)
-
思洋 · 深圳
深圳市坂田十二橡树庄园F1-7栋
Site/ http://www.szciya.com
E-mail/ itciya@vip.163.com
品牌服务专线:400-001-5281
-
思洋 · 湖南
长沙市天心区芙蓉中路三段398号新时空大厦5楼
联系电话/ (+86 0731)88282200
品牌服务专线/ 400-966-8830
-
旗下运营网站:


Copyright © 2016 广州思洋文化传播有限公司,保留所有权利。 粤ICP备09033321号


